Flash
I have finally found the time to implement and test in the Arduino the flash operation for the opensx70.
                  #if SHUTTER
                  shutterOPEN ();
                  delay (51);
                  digitalWrite(FFA, HIGH);
                  delay (25);
                  analogWrite (Solenoid1,0);
                  digitalWrite(FFA, LOW);
                  delay (26);
                  shutterCLOSE();
                  #endif
I just roughly “translated” in my code the sequence in the Repair Manual.
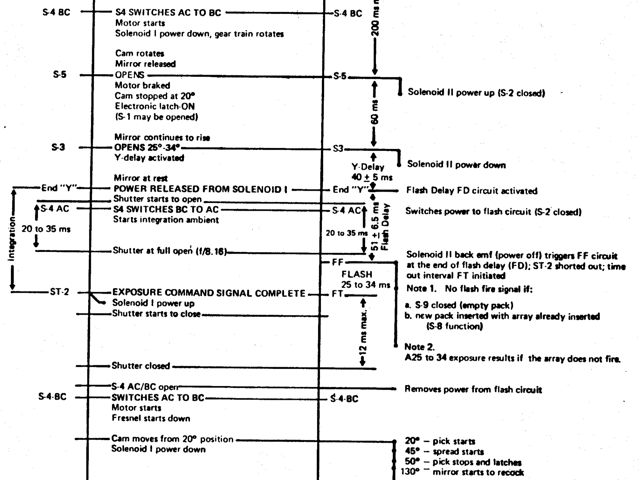
As you can see in the slowmo video it is almost spot on!
It took me a while to figure out the flash but in the end it is really really simple. I just have to connect F+ to 6v from the camera, F-to GND, and then send a straight control signal from the Atmega to FF. The FT pin I don’t know it’s use, but we don’t need it at all.
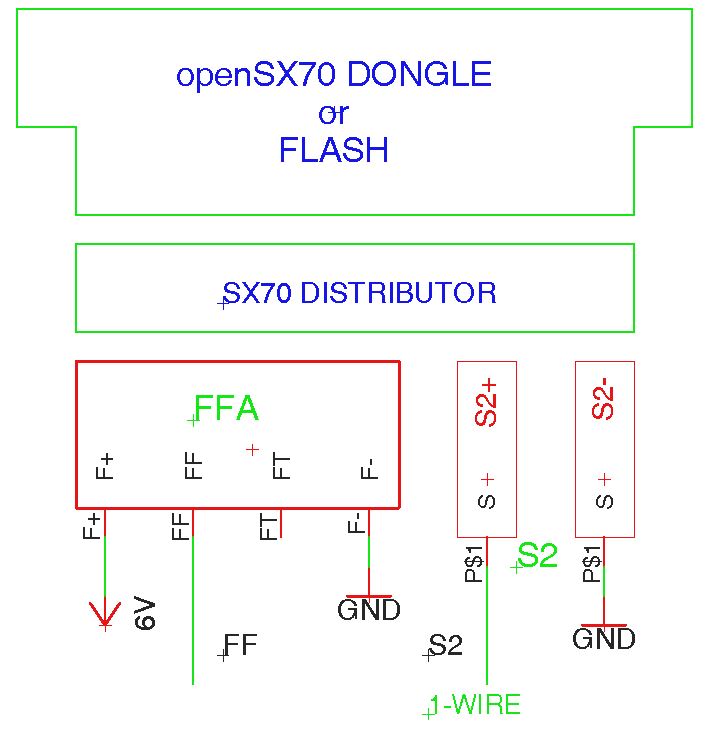
I thought that external flash operation was one of the improvements I could implement. Of course “normal”flash operation had to be mantained, but I also wanted the posibility to have a PC socket in the dongle, with different options (you can always use the adapter for PC).
In the opensx70 camera there are thus two ways of hooking a flash or studio light to the camera, directly to the flash edge connector or through the built in jack on the dongle (thus keeping the Dongle in place, Here you will have the option to engage or not solenoid 2, and maybe a slower shutter speed. I have also tested this a seem to work as well:
Preventing Solenoid 2 from firing gives you full aperture F.8 flash operation from any distance.
Next I will test activating the solenoid.
Comments